Wednesday, November 13, 2024

ABC CHRISTMAS CHALLENGE -- W IS FOR WATERCOLORING, AND X IS FOR XYLOPHONE

 Hello, crafty friends!  Welcome back to the blog.  It's time for the next to last ABC Christmas challenge of the year...can you believe it?  I know I'm finding it hard to fathom that 2024 is almost over, but anyway...this month's challenge is

W is for Watercoloring

and 

X is for Xylophone (inspiration pic)


And here is my card:


I'm not all that comfortable with water coloring, so I made a card following the X is for Xylophone prompt.  I have to say that this inspiration photo is pretty darn cute, and I had lots of fun making this card!
I incorporated the rainbow colors of the tone plates (Yes, I had to look that up!) with this cute striped paper from my stash, and the adorable bear is called Cocoa Bear from Impression Obsession.  I placed him on a panel die cut from my favorite white glitter cardstock from Walmart, and he is holding a cute gingerbread cookie, also from Impression Obsession.  The speech bubble and sweet sentiment are from My Creative Time.
If you still need to bump up your Christmas card stash for this year, or you are already creating for next year (#jealous), head on over to the ABC Christmas Challenge blog for lots of gorgeous inspiration from the rest of the DT.  Enter your card creations into the challenge for a chance at a fabulous prize!

Until next time, take care!

💗💗 ~ Marie  💗💗


Friday, October 18, 2024

{BYSHC} FALLING FOR THE HOLIDAYS LINKY PARTY -- OCTOBER 18-25, 2024

Hello crafty friends!  Welcome back to my blog!  It's time for another fabulous Linky Party with the Build Your Stash Holiday Card Makers! 

Please use hashtag #fallingfortheholidays2024byshclp when adding your cards to social media platforms.

Here is my first card:

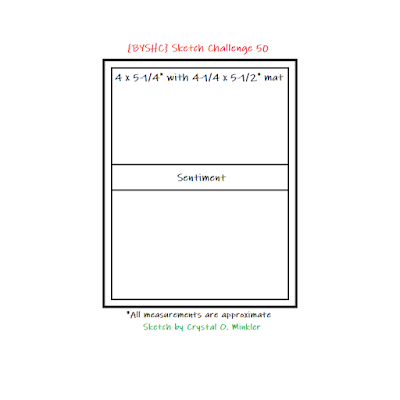
I am killing 2 birds with one stone again by using the current Sketch 50.

This sketch is wonderful for mass producing cards, which can be necessary during this time of year!  All you really need is some pretty patterned paper and a sentiment!  I did not use patterned paper for my card; rather I utilized one of the many stencils I have from our wonderful sponsor for the month of October, A Colorful Life DesignsThis particular stencil is called Dotted Flakes.  Such a pretty pattern that can be used in so many ways!  Here I chose simple ink blending with Tumbled Glass and Broken China oxide inks.  Before I did anything else, I moved both the panel and the stencil to my splatter box and sprayed it with water and Perfect Pearls.  I die cut the stenciled panel with a deckled rectangle die, which I then layered onto a piece of my favorite white glitter paper from Walmart (which I need to get more of!).  I adhered that layer onto another panel that was inked with the Broken China oxide ink, and all of these layers were adhered to the card base.  The iridescent ribbon across the middle was a scrap on my desk.  For the sentiment, I inked a scrap of cardstock with the Broken China oxide and die cut the "believe" sentiment several times from Honey Bee Stamps Bitty Buzzwords:  Holiday Honey Cuts, and also cut the shadow layer from a scrap of vellum to provide some definition from the stenciled panel.  As a last-minute addition of sparkle, I adhered some A Colorful Life Designs card bling in Opalescent Maui to the 6 whole snowflakes on the panel.  I love how this card came out!

The BYSHC Linky Party starts today, October 18, and runs thru Oct 25...plenty of time to make a bunch of cards for your stash, and possibly win a prize from one of the linky party sponsors!  WOOT, WOOT!  Thanks so much for stopping by today!

~ Marie


Wednesday, October 9, 2024

ABC CHRISTMAS CHALLENGE -- U IS FOR UNUSUAL CHRISTMAS COLORS; V IS FOR VELVET

Hello crafty friends!  Welcome back to my blog!  It's time again for a new challenge at the ABC Christmas Challenge blog:

U is for UNUSUAL CHRISTMAS COLORS

and 

V is for VELVET


I pondered for a bit how to include velvet on my card, and then the answer suddenly slapped me in the face -- RIBBON!  DUH!!! 😖  And of course, out of ALL.THE.RIBBON that I have, I actually had NO VELVET ribbon.  So, a trip to Hobby Lobby was necessary to acquire said ribbon.  I swear that is ALL I bought!! 👌  Ok, enough chatter, here is my card:


It really makes me happy when I am able to combine both letters on one card!  The colors I used are definitely unusual for a Christmas card, and the white velvet ribbon is just yummy!  I even have a triple whammy with this card, as the colors I used are Aged Mahogany and Victorian Velvet oxides.  HA!  The pretty stencil I used here is called Snow Doily from A Colorful Life Designs.  After I finished the ink blending, I cut the design in half, so I would have room for the "joyful wishes" from Lawn Fawn's Winter Scripty Sentiments set.  I stamped it with the Aged Mahogany oxide ink.  I think this card turned out very pretty!
Oh, and a note about the white velvet ribbon.  It is very see-through, so I glued it to a scrap of white cardstock first, and then glued that onto the card.

Don't forget to head on over to the ABC Christmas Challenge blog to check out what the rest of the DT has created.  This challenge runs from today, Wednesday, October 9th to Saturday, November 9th.  I look forward to seeing what you will share with us! 

Until next time, take care!

~ Marie 💗


Wednesday, September 11, 2024

ABC CHRISTMAS CHALLENGE -- S IS FOR STENCIL; T IS FOR TRADITIONAL CHRISTMAS COLORS

Hello, crafty friends!  Welcome back to my blog; it is so nice to have you come by for a visit!  Today, I am sharing the cards I created for the current ABC Christmas challenge:


S is for STENCIL

and 

T is for TRADITIONAL CHRISTMAS COLORS


Here are my cards:


These cards were easy and fun to make, using stencils from the amazing A Colorful Life DesignsFor the top card, I used the All Over Trees Stencil and kept it mostly monochromatic with kraft cardstock and Vintage Photo oxide ink, with the exception of that one tree in the lower left center that I slathered in green Stickles.  The card with traditional Christmas colors features the Chunky Chevron Stencil, which is one of my favorite stencils!  The inks I blended on this card are Lumberjack Plaid and Mowed Lawn oxides.  To cover the transition between the 2 colors, I added a die cut piece that mimics the icing on the sweet gingerbread man (Thanks for the idea, Karen!).  Speaking of the cute gingy, he is from the Small Gingerbread Bag Topper die from KS Crafts.  His adorable face comes from the Faceless Gingerbread and Marshmallow Treats stamp set from Peachy Keen Stamps.  For fun, I adhered him to the card panel with an action wobbler.  The sentiments on both cards are from the Sweet Holiday Wishes stamp and die set from My Creative Time.  And that's all there is for these cards!

Thanks again for stopping by my blog!  Check out the rest of the DT card makes over on the ABC Christmas challenge blog, where you are sure to be inspired!

Until next time, take care!  😊

~ Marie


Sunday, August 25, 2024

GUEST DESIGNER AT THE RUDOLPH DAYS CHALLENGE!

Hello, crafty friends!  Welcome back to my blog!  Today, I'm here to share the card I made as a guest designer for the Rudolph Days Challenge.  I was lucky enough to be chosen by Helen to join her this month, and here is my card:


I used the new Waffle Flower Postage Collage Gingerbread Stencil set with the coordinating Postage Collage Die to create my fun, pastel Christmas card.  Anyone who knows me IRL will tell you that I am obsessed with all things gingerbread!  Oh boy, was this quick and fun!  I used oxide inks in Kitsch Flamingo, Salvaged Patina, Vintage Photo, and Ground Espresso, and I think these colors work nicely together.  I think I could also do this card again and switch the Kitsch Flamingo and Salvaged Patina.  SO CUTE!  The only thing I would do differently in the execution is to NOT die cut the panel before ink blending.  I had some trouble lining the different layers up, but I managed OK. 

The scalloped die cut layer behind the postage collage die is from Whimsy Stamps Sprinkles Scallops Rectangle Set, and I blended the Salvaged Patina ink onto the panel so it would be a perfect match.  I adhered the postage collage panel to the scalloped layer with dollar tree foam squares and glued that combo flat to the card base.   The sentiment is also from Waffle Flower and comes from the new Elegant Christmas 2 Combo.  I added some beautiful Opalescent Lanai card bling from A Colorful Life Designs to the uncolored circles on the snowflake cookie.  They are the perfect match for the Salvaged Patina color!  😊  I love, love, LOVE these products from Waffle Flower SO MUCH!!

Anyway, that's my guest designer card for the Rudolph Days Challenge.  Thanks so much, Helen, for allowing me to play along this month.  Oh yeah, I forgot to mention that this is an Anything Goes Christmas challenge, so when you join in, let your creativity run free!  Thanks so much for stopping by and take care!

~ Marie

Wednesday, August 14, 2024

ABC CHRISTMAS CHALLENGE -- P IS FOR PINK, Q IS FOR QUARTET, AND R IS FOR RUDOLPH

 Hello, crafty friends!  It's time for a new challenge at the ABC Christmas challenge blog, and this month we are featuring the letters P, Q, and R.

P is for Pink 

Q is for Quartet

R is for Rudolph

As usual, I was running behind again, so I only managed to make one card for one letter:


I used all products from My Creative Time to create my card, and I think it turned out super cute!  I was trying to go for a well-used grandma-looking apron, but I think I just ended up making it look dirty, LOL!  I had a fun time doing all the die cutting and inking for this card, and I even managed to use the BYSHC Sketch 48!  I realized after gluing my doily down that I had glued it onto the wrong side of the card, but I had to go with it at this point!  OOPS! 😕

Well, it's late, and I gotta get to bed!  Until next time, take care!

~ Marie


Friday, July 19, 2024

IT'S CHRISTMAS IN JULY TIME AT BUILD YOUR STASH HOLIDAY CARDMAKERS -- JULY 2024

Hello, hello crafty friends!  It's time for the Christmas in July Linky party at {BYSHC}, WOOT!  WOOT!  We have a great lineup of sponsors for our hop again, which you can see in the blog post HERE.  Take note of the dates on the graphic:  


Here is my card:  


I used a sponsor's product on this card, but you can't see it!  It's called Sticky Lines, and it's from Therm-o-Web.  I had never used the Sticky Lines product before, but I am definitely a fan!  It is supposed to be used to adhere ribbons and borders, and it works absolutely perfectly!  My ribbon width wasn't as wide as the Sticky Line, so I did spend some time removing the exposed adhesive (crafty OCD), but I think it was well worth it in the end.  The ribbon is a super cute transition between the patterned paper and the card base.  Let's go over the card ingredients.

SUPPLIES

Brown Gingham Patterned paper -- My Creative Time Christmas Gingers 6"x 8.5" paper pad
Teal paper with white polka dots --My Creative Time Ginger Chefs 6x6 paper pad
Circle die -- Pretty Circle Layer dies from My Creative Time
Cute Gingerbread person -- Ginger Boy & Girl dies from My Creative Time
Stamped Face -- Faceless Gingerbread and Marshmallow Treats stamp set from Peachy Keen Stamps, stamped with Lawn Fawn Jet Black ink
Sentiment -- You Warm My Heart Stamp set from My Creative Time, stamped with Versa Fine Clair Nocturne ink
Peppermint clay pieces -- from my stash
Ribbon -- from my stash, most likely from Walmart
Rosy cheeks -- Worn Lipstick oxide ink
white gel pen
red glitter gel pen

Thanks for stopping by my blog for DAY 1 of the Build Your Stash Holiday Cardmakers Christmas in July Linky Party I hope you will also take some time to visit the rest of the DT blogs to read about their creations and to leave them some comment love!  We can't wait to see what YOU will create for the Linky Party -- the more you join in, the more chances you have to win a prize!  Until next time, take care!

~ Marie


Tuesday, July 16, 2024

SQUIRRELZ STASH BASH -- JULY 16, 2024 -- FAVORITE HOLIDAY

Hello friends; welcome back to my blog!  My Squirrel Sisters and I are back at it again, hoping to inspire you to dig out your supplies, old or new, and get creating!  This month's theme is 

FAVORITE HOLIDAY

If you've been around my blog a while, there should be NO QUESTION in your mind what my favorite holiday is:


CHRISTMAS!!!

As long as I can remember, I have always enjoyed the festive season, the brightly colored lights, the smells of yummy goodies baking, the fun decorations, all of it.  I haven't forgotten The Reason for the Season, but all the other "stuff" just makes me so happy!  Of course, it IS a bit different now that all of the effort to decorate, bake, etc. falls on me (and hubby), but I still take time to enjoy all the things.  Anyway, here is my card:


So, the panel for this card started out as a "stamp off" from a stencil project that will be shared soon.  I couldn't bear to waste all of the gorgeous Gina K layering inks in Spruce that I used for that project, so I sprayed the stencil with a water and Perfect Pearls mixture and stamped it down onto another piece of cardstock.  The end result is this fun panel. This stencil is actually part of a set called Mid Century Mod Pods from A Colorful Life Designs.  I took the partner stencil and placed it over my dry panel and traced onto the ovals with a gold gel pen.  Super fun look!  I had this cute peeking deer die in my stash and decided to use it as the focal point.  I didn't have the sentiment I wanted to go with my deer, so I printed one out myself.  The scalloped rectangle behind the panel was cut with a Gina Marie Designs die.

Ok friends, you know how this goes by now...for more inspiration, hop on over to the next Squirrel Sister in line, who is the amazing Anna.  I wonder what her favorite holiday is??  Here's the hop lineup for you:

V at Passions and Distractions

Karen at Misplaced Mojo

Marie (you're here!)

Anna at CraftyAnna Studio

Lounon at Craft.Me.Craft.Moi

Thanks so much for stopping by and have a great week! 😊


~ Marie


Wednesday, July 10, 2024

ABC CHRISTMAS CHALLENGE -- N IS FOR NO STAMPING AND O IS FOR OFF THE EDGE

 Hello my friends!  It's time for another new challenge at the ABC Christmas challenge blog!  This month's themes are:

N is for No Stamping

and

O is for Off the Edge

I was really hoping to get a card made for both letters this month, but sadly I only had enough time to get one made for the No Stamping theme:


I don't know the name or maker of this die, but it sure is pretty!  I die cut it and the JOY sentiment from my favorite Pen + Gear white glitter cardstock, and simply adhered them directly to my card base on which I ink blended Gina K Sea Glass ink.  I think this would be great to mass produce using different shades of blue ink to make a nice gift set.  And that's all there is to it!

Thanks so much for stopping by my blog today!  Now don't forget to head on over to the ABC Christmas challenge blog to see the rest of the DT inspiration, and to join in!  You have until Saturday, August 10, 2024, to play along, so what are you waiting for? 😊

Take Care,

~ Marie


Wednesday, June 12, 2024

ABC CHRISTMAS -- L IS FOR LANTERN, M IS FOR MUSIC

 Hello crafty friends!  It's June already, and it's time for another prompt at the ABC Christmas Challenge!  I am the hostess this month and we are now up to the letters L & M:


L is for Lantern

&

M is for Music


I created a card for each prompt this month, and here they are:


Looking at my first card now, I am thinking that my lantern is more of a lamppost, but this is the image that came to mind when I started the creative process.  I really love this image from the now defunct Whimsie Doodles shop.  The snow people are just too cute!  To create this scene, I ink blended the Cloud Edger stencil from A Colorful Life Designs onto the stitched oval die from the Let It Snow die set from Whimsy StampsI added splatter with the same oxide ink (I wish I remembered which one I used!), and the white shimmer paint from the Kuretake Starry Colors palette.  I die cut the sentiment from the Pen + Gear white glitter cardstock from Walmart.  All the elements were mounted onto a piece of navy cardstock die cut with a Gina Marie Designs Wonky Stitched Rectangle die.

My second card focuses on a cut file from the Silhouette Design Store, which I can't find there at the moment. 😦  It's supposed to be a card in and of itself, but I die cut the bells with my Spellbinders Classic Circle dies instead.  I backed the cut image with a Petite Scalloped Circle Spellbinders die, cut from shimmery silver paper I bought from Target years ago.  The die cut "silver" sentiment is cut from the same paper using Lawn Fawn's Henry's ABCsThe "bells" part of the sentiment comes from the Lawn Fawn stamp set Henry Jr.'s ABCs and was stamped with Delicata silver ink onto a small banner.  I mounted everything onto a panel embossed with the Swiss Dots embossing folder.

Well, those are my cards for this month!  Head on over to the ABC Christmas Challenge blog to see the rest of the DT makes, and to add your entries to the linky for a chance at the prize on offer!  We can't wait to see what you create!

Take Care!

~ Marie 💖

Wednesday, May 1, 2024

SQUIRRELZ STASH BASH -- MAY 1, 2024 -- THE OLDER, THE BETTER!

Howdy, crafty friends!  The time has come for my Squirrel Sisters and I to get together and use some of our supplies that have been languishing in our crafty areas.  We call this the: 
This month, we tasked ourselves with using supplies that were at least 2 years old that had never been given any love.  I even went so far as to check the dates of when I had ordered what I wanted to use to be absolutely sure that I was following our prompt to the best of my ability.  Here is what I created:


I have been really loving using stencils from A Colorful Life Designs these past few months of being on their design team, so I really wanted to check my stash to see what stencils I had that I hadn't used yet that were hanging out here for at least 2 years.  This cool Changing Dots 6x9 stencil made for a neat "neutral" background for any type of card I decided to make and paired with these sweet butterflies from the Winged Wonders stamp set from MFT, and beautiful inks from Gina K Designs, this card came to life.  I was inspired by a card on Pinterest made by Caly Person using this same stamp set.  I love that we can be inspired by someone else's work and come up with something completely our own in the end!

For starters, I ink blended through the stencil with the following Gina K inks:

Coral Reef
Tangerine Twist
Wild Dandelion
Lucky Clover
Turquoise Sea
Wild Lilac

After ink blending, I sprayed through the stencil with Perfect Pearls mixed with water.  It's subtle, but the shimmer is there!  I couldn't let that shiny ink on the stencil go to waste, so I grabbed another piece of white cardstock and pressed the stencil onto it.  That panel is even more subtle, but it's really cool.  Anyway, I sat the ink blended panel aside to dry, and stamped out the butterflies with Versa Fine Clair Nocturne ink and heat embossed with clear embossing powder.  Then they were cut out using my Scan N Cut machine.  
Like Caly did, I water colored 3 of the butterflies with the same Gina K inks I used for the card panel.  While they dried, I die cut my panel with the largest Wonky Stitched Rectangle die from Whimsy Stamps.  This die set is one I use quite often, but I love it, so...😁  
In classic Gina K style, I added my colorful panel to a nice black panel of Hero Hues Pitch Black cardstock.  This is a recent acquisition, and I like it a lot!  The sending love sentiment also comes from the Winged Wonders stamp set.  I mounted each butterfly with a combination of thick $$$ 🌳foam tape (under the wings) and glue under the body.  I really like how this card turned out!

OK, you know the drill...this is a hop so it's time to visit the next Squirrel in line, which happens to be the sweet Anna of CraftyAnna StudioThe whole hop lineup is as follows:

ME---You're already here! 😊

Thanks for stopping by!  Please enjoy our little hop and be sure to leave us some comment love!  I know I can't wait to see what my Squirrel Sisters have created!  😊

Until next time, take care!

~ Marie💗


Friday, April 19, 2024

IT'S TIME FOR THE {BYSHC} SPRING INTO CHRISTMAS LINKY HOP 2024

Hello, crafty friends!  It's time again for the linky party hosted by the Build Your Stash Holiday Cardmakers. 

This linky party is a great opportunity to get a head start on your holiday card stash, if you haven't already.  And just because this linky party is hosted by {BYSHC}, that doesn't mean you have to use one of Crystal's fabulous sketches to participate. We just want to help you get your holiday card stash built up!  But it is easier for me to have a great sketch to start from, so I'm using one. 😊
And here's my card:


I used products from Linky Sponsors Lawn Fawn and Gina Marie Designs for this card.  I started out by choosing a patterned paper from one of my Lawn Fawn 6x6 paper pads, and I decided on this sweet pink Lost Mitten paper from the Knit Picky Winter petite paper pack.  I die cut it with the largest Gina Marie Designs Wonky Stitched Rectangle die and layered it onto a piece of pink cardstock from Michael's.  I was very pleased to find it to be a near perfect match for the patterned paper. 😊  To go along with the sweater theme, I stamped out several images from the Ugly and Bright stamp set.  Ultimately, I decided to use the adorable bear and I had him don this cute snowflake sweater.  For a change of pace, I colored the images with colored pencils.  I used my Scan N Cut to cut the images but didn't care for the white outline around the sweater, so I fussy cut it out. 😬  Thank goodness it's an easy image!  To add to the "ugly sweater" vibe, I added clear glitter gel pen to the snowflakes on the sweater.  For the element in the middle of the sketch, I used the smallest of the Gina Marie Wonky Stitched Rectangles and stamped one of the sentiments from the same set in Versa Fine Clair Nocturne.  This card came together so quickly, and it turned out so cute!  I love this simple sketch! 💗

Be sure to head on over to the BYSHC linky party here to join in on the fun...we have so many fabulous sponsors, and there are lots of prizes to be won, so you don't want to miss out!

Thanks for stopping by and take care!

~ Marie 💗💗


Wednesday, April 10, 2024

ABC CHRISTMAS -- H IS FOR HATS, I IS FOR INKY

 Hello, crafty friends!  Welcome back to my blog.  It's time again for a new challenge at ABC Christmas, where it's letters H and I we're being inspired by:

H is for HATS

I is for INKY

And here is the card I created:


I killed 2 birds with 1 stone making this card; I got inky by blending Gina K's Turquoise Sea ink through the awesome Pile of Presents 6x6 stencil from A Colorful Life Designs, and the adorable print & cut elf from Stinkin Cute Paper Piecings (Silhouette Design Store) is wearing the classic elf hat.  I added further detail to the presents by offsetting the stencil to the left just a hair and outlining each one with a clear Sakura Gelly Roll pen.  Of course, this effect looks much better in real life than it does in a picture. 😄  

I die cut the stenciled image using a die from the Spring Ovals set from Whimsy Stamps.  The sentiment is from an Elizabeth Craft Designs/Karen Burniston stamp set called Holiday that I got in a recent destash.  My green cardstock layer didn't exactly match the green on the elf image, so I inked the edges with Rustic Wilderness oxide ink.  And that's it!

Thanks for dropping by, and don't forget to head over to the ABC Christmas challenge blog to see what the rest of the DT has made to inspire you.  The challenge will run until May 4th, so there's lots of time to join in and get that Christmas card stash built up!  😉


Until next time, Take Care!


~ Marie 💖

Wednesday, March 13, 2024

ABC CHRISTMAS -- E IS FOR EMBOSSING, F IS FOR FAUX, G IS FOR GINGERBREAD

 Hello crafty friends!  I'm dropping by really quickly to share what I created for this month's ABC Christmas challenge, which is 

E is for EMBOSSING

F is for FAUX

G is for GINGERBREAD

Since gingerbread was my suggestion, of course, I chose that for my card:


I apologize for the quality of the photo, but my new phone changes what some of my pictures look like after they are taken, and I haven't figured out how to fix it yet.

Anyway, I finally busted out the MFT Gingerbread Greetings Card kit that I bought when it was released.  So, so cute!  I do need to re-do the sentiment though...I stamped it directly onto the glitter paper, and it didn't fare well at all.  I added lots of shimmer and shine by using glitter paper, shimmer watercolors, Stickles glitter glue, and Diamond Dotz.  This was a fun card to make, and I hope I get to make some more for this coming Christmas!


Head on over to the ABC Christmas challenge to see what the rest of the DT has created, and don't forget to join us!  We love to see what you create!


Until next time, Take care!


~ Marie  💖

Wednesday, March 6, 2024

GUEST DESIGNER FOR THE PAPER FUNDAY -- MARCH 2024 --THE DIES HAVE IT

Hello again, crafty peeps!  I'm back on the blog today to share what I created as the guest designer for The Paper Funday challenge for March, where the challenge is:

The DIES have it! (use dies/die cuts in your design)


Here is my project:

Aren't they adorable?  I created these sweet ginger bunnies using dies from My Creative TimeThese cutie patooties are the Giant Ginger (left side), and Giant Girl GingerEmma, the owner, is always coming up with such awesome stamp and die sets, you really should check out her shoppe!  I die cut the ginger bodies from Almond Creme Bazzil cardstock, and blended Vintage Photo oxide ink around the edges.  To make these cute gingers into bunnies, I added the bunny ears and Easter baskets from the Ginger Easter TWO set, as I thought the sizing was just right to fit the Giant Gingers.  Now, since I had dressed the girl ginger using the Giant Girl Ginger Accessories die set, I had to give the boy an outfit as well, so I cut the boy ginger die from one of Emma's more masculine-looking patterned papers to make him a shirt, and then from a piece of dark navy cardstock for his shorts.  I think that turned out so cute!  I added Star Dust stickles to the frosting squiggles and "hair", but I noticed after I took the pictures that I forgot to add some to her bun.  I will fix that later.  The paper pads I used all come from My Creative Time:

Christmas Gingers 6x8.5" (boy shirt)
Ginger Chefs 6x6 (dress)
Script, Hearts & Solids 6x6 (Easter eggs)

Here are pics of the boy and girl separately:


To add some texture to the baskets, I ran them through my Cuttlebug with a plaid embossing folder.  The sweet smiling faces both come from the Giant Ginger stamp set.  I stamped them in VersaFine Clair Pinecone ink, and heat embossed with clear embossing powder.  I added Tattered Rose distress ink to their cheeks for blush and used a white gel pen to add dots to the blush, and also to the eyes.  And then I called this project finished!

Be sure to check out The Paper Funday challenge this month and submit your die cut projects into the linky.  This kind of prompt is definitely open to lots of interpretation, so I am expecting to see lots of entries!  I can't wait to see what you all create!  

Until next time, take care!

~ Marie 💖


Monday, March 4, 2024

SQUIRRELZ STASH BASH FEB 27, 2024 -- NEW, NEW, NEW!

Hello crafty friends!  It's finally time!  My crafty Squirrel Sisters and I are BACK!  We took a hiatus over the holidays which ended up stretching out just a *little bit* longer than expected.  While we were off, we took some time to contemplate what our next moves were going to be.  I still don't think we have it all completely settled, but HEY, one thing at a time!

For now, we are back with the theme of:

NEWEST SUPPLY

For me, that could mean any number of new things, but I chose to work with this ADORABLE chicken from Peachy Keen Stamps.


ACK!  Isn't this just THE CUTEST chicken stamp EVER?!?!?  The chicken is actually made from 2 different sets of stamps; the chicken body comes from the PK-1375 Faceless Chickens set, and the face is from the PK-1374 Chickie Faces 1 1/8" set.  These were on my secret wish list for a LONG TIME, and then when the owners of Peachy Keen Stamps had a sale on Valentine's Day, I jumped on the chance to get my inky fingers on a set!

With this card, I hope I was channeling my inner Anna Wight and Jillian Norwood with the vintage vibe I was going for.  The cute gingham papers come from the Honey Bee Stamps Gingham Galore Fall 6x6 paper pad, that I got multiples of when Honey Bee put them on the retiring list.  I mean, come on, who doesn't love some cute gingham paper?  Both pieces of gingham were die cut with 2 sizes of Gina Marie Designs Wonky Stitched Rectangles.  I die cut the image with the largest of the Spellbinders Classic Oval dies, and the mat layer is from the largest Lacey Oval die.  I inked it up with Iced Spruce oxide ink, as that matched the green gingham paper perfectly.  The cute chickie is colored with Copics, and highlighted with white gel pen.  The sentiment banner was cut with a die from Whimsy Stamps Quick Strips die set.  I cut multiples of the same die and cut them apart to accent the upper left corner of the card.  I inked all the paper and cardstock edges with Vintage Photo oxide ink.  And that's it!  

Now, if you've been here before, you know this post is part of a small hop, and the next talented gal you should be checking out is V at Passions and Distractions  Before me, you should have come from the fabulous Lounon at Craft Me, Craft Moi.

I thank you so much for stopping by today, and I hope you will have fun on our little hop!  Until next time, take care! 

~ Marie 💖


ABC CHRISTMAS CHALLENGE -- W IS FOR WATERCOLORING, AND X IS FOR XYLOPHONE

  Hello, crafty friends!  Welcome back to the blog.  It's time for the next to last ABC Christmas challenge of the year...can you belie...