Card number 4!

Hello friends! As you can see from my title, this is my last card as a DT member for Digi Doodle Studios. Dina is closing the digi shop after October 31st in order to concentrate all her energy on her physical stamp, die and paper line, Ink N Splatter. I wish her the best.


Hello friends! Welcome back. Today is the day that my crafty friends and I (aka the Squirrel Squad) get together and do a little hoppin'! As you may or may not know, the goal for our little hop is to use some of that "squirreled away" stash of crafty goodies that we have collected and not yet used. And throw in a technique we want to try or a specific supply or theme. This month, we are focusing on BUTTONS and VINTAGE. I do have a nice little collection of buttons that I don't really use, so it's good to be busting those out. The vintage theme is a bit harder for me to work with, as it really isn't my crafty style. I love the look of it, but actually CREATING IT is a different story. Before I show you my card, let me share the hop list with you in case you get lost:
V at Passions and Distractions
Karen at Misplaced Mojo
Anna at Craftyanna Studio
Lounon at Craft Me, Craft Moi
Boryana ~ skipping this month
Marie ~ That's me!
And now, here is my card:

I went looking on Pinterest for vintage Christmas cards, and when I found the snowmen ones, I knew what I wanted to do. I busted out the new-but-not-yet-used Build-a-Snowman die set from Lawn Fawn and started die cutting pieces to match this fella here:

Isn't he just so joyful with his little birdie friend? I really do love the look of these old Christmas cards! I used the same colors as on this vintage card, and even gave him a coal nose instead of a carrot one.
I started out by die cutting the larger snowman from the white glitter cardstock from Walmart (my new favorite!). I used a scrap piece to test out which oxide ink color would look best and determined that Black Soot gave me the look I wanted...as long as I used a light hand to ink blend. Light-handed ink blending is NOT my strong suit, but I think I managed it well here! 😀 I die cut the rest of the pieces I needed from red, black, and kraft colored cardstocks, and added details and shading with white gel pens and the Black Soot oxide ink. I built my snowman, and then added Glossy Accents to the entire hat, the coal nose, his eyes and each dot of his smile. I think it really adds to the look! Then I had to wait for it to dry....
In the meantime, I worked on the rest of the card. I decided that I really liked the green background on the vintage card, so I dug out a similar shade of green, and then...inspiration struck! I have had the Honey Bee Stamps Pierced Fancy Flakes Cover Plate in my card making stash for at least a year now without having touched it other than to repackage it and put it away. I thought this would be a great way to add more interest to the background without getting too fancy or complicated. I cut my panel to 4.25" x 5.5", and then ran it through my Cuttlebug (yes, I am still using it!) with the cover plate on top. I then chose the largest rectangle from the Spellbinders A2 Matting Basics A Card Creator die set to cut the panel down to allow for a small bit of the card base to show. After the die cutting, I then did the ink blending around the edges.
For the sentiment, I chose to use Lawn Fawn's Winter Big Scripty Words stamp and die sets. I stamped Let It Snow with Versa Color white pigment ink onto a scrap of black cardstock, and then heat embossed it with Recollections Snow embossing powder. After the embossing was cool, I die cut it with the coordinating die.
When the Glossy Accents was finally dry, I glued the hat band to the hat, and added white gel pen accents on top of the dried Glossy Accents. I carefully gave Mr. Snowman some rosy cheeks with a R22 Copic marker and added a white gel pen dot in the middle of each one. I debated about whether or not I wanted to use an action wobbler to adhere him to the card, but I decided just to use thick foam squares. The green panel and the sentiment were both adhered down flat with Bearly Art Glue. And that's it! I have to admit that I waited until the last minute to make this card and write my blog post...even more so than I usually do! I really need to get better at that...
Anyway, thank you for stopping by! I hope you all have a nice weekend. Don't forget to hop on to V's blog to start the hop if you just happened to land here first. Also, we would love it if you would leave us some comment love and subscribe to our blogs if you haven't already! Until next time, my friends...
💗 Stay Healthy, Take Care, and God Bless! 💗
~ Marie
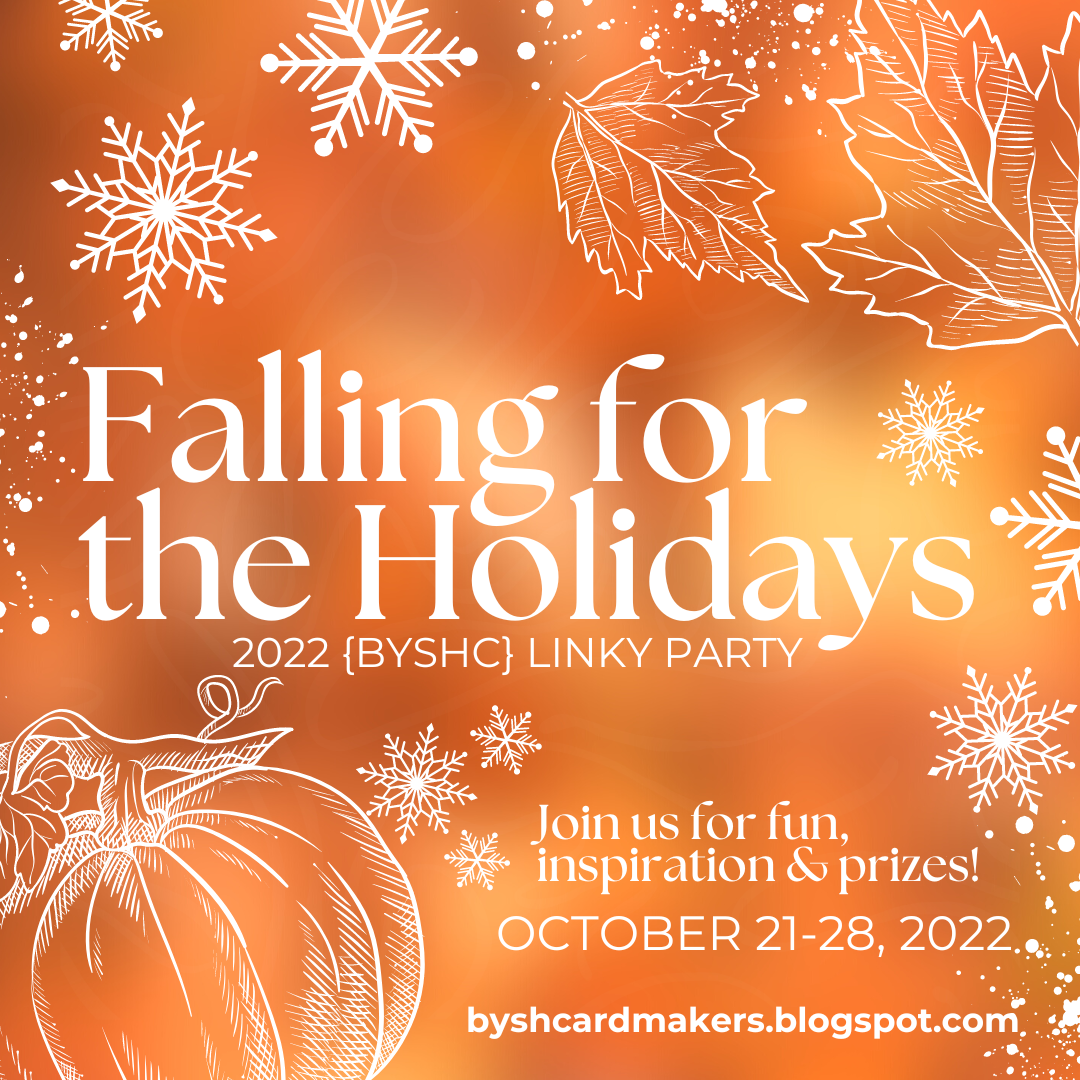
Hello friends! It's time, it's time! It's finally time for the Falling for the Holidays 2022 Linky Party at Build Your Stash Holiday Cardmakers!!

Hey there friends! I just wanted to let you know about this exciting event starting this Friday...

Hello friends! I hope you're all having a nice weekend! Hubby and I went to Gettysburg, and the weather was perfect! Today is the start of another new ANYTHING GOES challenge at Lil Patch of Crafty Friends and our sponsor is
**Sponsor**
Sheepski Designs

Prize: 3 Images
I got to chose an image this time, and of course I went with a Christmas theme:

I chose this pretty Christmas Bells image to work with. In planning the coloring for this card, I had it in mind the whole time to make the bells gold, but when it came time to do it, the song Silver Bells was going through my head, so what else could I do but color them silver? I used a silver metallic pen from Recollections to color the Bells, taking care the whole time not to go over the black lines of the image. If I did, I went over them later with a Micron pen. I used mostly gel pens to color this image, but I also used green Copics on the holly leaves. I used the current Sketch #27 from {BYSHC}Sketch #27 from {BYSHC} to construct my card, and foil cardstocks in gold and green. The sentiment comes from the Mama Elephant Joyful Greetings stamp set and coordinating Creative Cuts.
--CHALLENGES--
Well, that's all I have for today! Thanks for stopping by, and don't forget to stop by the Lil Patch of Crafty Friends challenge to enter!
~ Marie
Hello friends, and Happy Wednesday! I hope that your week is going well so far, and that all of my Canadian family and friends had a great Thanksgiving. Today starts a new challenge at the ABC Christmas challenge blog. We are now up to the letters U for Unusual Christmas colors, and V for Velvet. Here is my card:

I was throwing around quite a few color combinations in my head before I started my card like navy with pink, and navy with orange; but then when I opened the drawer unit my colored cardstocks are in, I came across this cardstock pack from Recollections called Cool Water. It has a light and dark teal, light and dark purple, and a dark gray in it that go so well together, and I thought "HEY!" How about that for an unusual color combo for a Christmas card? So, then I thought, how can I incorporate some or all of these colors on one card and make it look nice? Spellbinders Kaleidoscope Plaid dies to the rescue! I die cut several of each layer from the two teals and the lighter purple so I could play around with which patterns would look best, and I ultimately settled on this combo. After die cutting and assembling 4 of the layered plaid pieces, I cut the dark gray cardstock using the largest rectangle in the A2 Matting Basics Card Creator Set A to use as a mat behind the plaid layers. I adhered them to the mat using the corners as my guide for placement.
To top this off, I felt that it just needed a bold sentiment, and I just so happened to recently purchase the Bold Merry Words Creative Cuts from Mama Elephant, which was perfect! I die cut the Merry Christmas sentiment 4 times from some scrap Accent Opaque 100lb. cardstock and stacked them up beneath a white glitter layer cut from White Glitter Cardstock from Pen+Gear that I bought at Walmart. I forget where I saw someone else that had used this on a project, and I just thought it was so gorgeous that I had to have it. Never mind that I already had other white glitter paper and cardstock! The colors on this one are slightly different from what I already had, so it's OK. 😁 That's what I tell myself anyway!
--CHALLENGES--
Thanks a bunch for stopping by today! We're getting closer and closer to that big card-sending holiday, so if you haven't started on your Christmas cards yet, you'd better get moving! While you're at it, come on over to the ABC Christmas challenge and join in with our letters U for Unusual Christmas colors and V for Velvet. I think these should definitely yield some creative cards! Also, don't forget to leave the DT some love for their inspiring creations! Until next time,
💗 Stay Healthy, Take Care, and God Bless! 💗
~ Marie
Hello friends! Welcome back to my blog, where I have some news to share with you. I have accepted a DT spot on the Build Your Stash Holiday Cardmaker team, otherwise seen as {BYSHC}!! I am super excited to be on this team, as it means that I get to use some fabulous sketches and ALL of my enormous stash of Christmas supplies to build up MY stash of Holiday cards! We are on Sketch #27 and here it is:


Hello friends! I hope you've had a good week! For my Canadian friends and relatives, I hope you will have a lovely Thanksgiving weekend; and for those of us elsewhere, I hope you just enjoy your weekend. 😊 I'm here today to share the card I made as a guest designer for the LeAnn's World 101 challenge. I came to be a guest designer by winning last month's challenge and being able to choose some images from her shop at LeAnn's World 101. Here's my card:

For this card, I used the sweet Candy image, and she was colored with Copics. My original plan was to have her dress colored in the lighter BGs, but as I continued to color the shadows, the whole dress got darker. I think it still looks nice though. For her hair, I went completely rogue and colored it with Cool Grays. Younger girls are doing that to their hair nowadays anyway, and I think it looks nice. I will continue to fight Mother Nature tooth and nail when it comes to my hair color changing to gray though! 😉
For the card layout, I was loosely following an old Papertake Weekly sketch. I had this green polka dot paper on my desk that I had planned to use on another card but chose a different paper for that one instead. I thought it matched her dress really well, and then I found this darker gray cardstock that I thought played off her hair. The green cardstock mat behind the image panel was also found to match pretty well. All of these cardstocks and papers are by Recollections. The glittery snowflake on top of the green polka dot paper was laying on my desk also, planned for another project that never came about. It's an acrylic ornament I picked up somewhere. Due to the dimension created by this ornament, I had to pop up most of the image panel with some foam tape. The sentiment is from a brand-new stamp set from Mama Elephant called Joyful Greetings. I stamped it with Versa Fine Clair Nocturne ink using the MISTI. I then cut it with the coordinating die from the Creative Cuts die set. I added dimension behind the sentiment by cutting four additional die cuts from cardstock scraps and stacking them up. And that's it! 😊
--CHALLENGES--
12 Months of Christmas Link Up #93: ATG Christmas (1/10)
Most Magical Time of the Year #1: ATG Christmas/Winter/Halloween/Day of the Dead theme
Besties International: ATG (1/3)
613 Avenue Create #10: ATG (2/10)
Crafts Galore Encore #104: ATG (1/3)
A Place to Start #10: ATG (2/8)
Happy Little Stampers Christmas: ATG
Morgan's ArtWorld #10: ATG (2/3)
Ellibelle's Corner: ATG (1/3)
QKR Stampede #453: ATG (1/3)
Creatalicious #244: ATG (1/3)
Colour Crazy #40: ATG w/coloring (1/2)
The Outlawz Twisted Thursday: ATG (1/3)
The Outlawz Festive Friday: Christmas (2/3)
The Outlawz October Linky: ATG
Well, that is all I have for this post. I will be back hopefully today with another post about another new DT I have joined! Until then my friends,
💗 Stay Healthy, Take Care, and God Bless! 💗
~ Marie
Hello friends! Happy Tuesday! I'm back today to share my final card for the Digi Choosday challenge blog. The DT theme was Autumn, and here is the card I created:

This gorgeous image is called Sharing is Caring from the Winnie Sugar Sprinkles collection. I colored her using Copic markers in Autumn colors, of course. I always feel like kraft is the perfect color to use for Autumn-themed cards, so I used a lot of it here! The image is die cut using the largest of the Spellbinders Classic Ovals, and the mat layer is cut using the largest of the Lacey Ovals dies. The gorgeous colors of foil cardstock come from various packs of 8.5x11 cardstock from Michael's. The pretty plaid paper is a 12x12 single sheet by Authentique that I got at Hobby Lobby. The die cut leaves and sentiment all come from the Stitched Fall Leaves Small Die of the Month set for September 2022 from Spellbinders. I opted not to stitch them for this card, but I bet they would look really pretty if I had stitched them. I die cut each stitching layer 3 times to really make them substantial. I had fun creating all the elements for this card, and I think it turned out well. 😊
--CHALLENGES--
Creative Moments #238: Autumn Colors
613 Avenue Create #10: ATG (1/8)
Crafty Gals Corner #235: Signs of Fall (1/3)
A Place to Start #10: ATG (1/8)
A Perfect Time to Craft #10: ATG
The Creative Crafters #56: ATG (2/3)
SheepSki Designs #67: Autumn Things incl. Halloween (1/3)
The Corrosive Challenge #10: ATG (1/4)
Crafty Friends #160: Use More Than One Die (1/5)
Dragonfly Dreams: Halloween/Autumn (1/3)
Pearly Sparkles #78: Autumn and/or Halloween
Sweet Stampers #72: Add a Sentiment (3/5)
Morgan's ArtWorld #10: ATG (1/3)
The Crafting Challenge: Autumn Colors (1/3)
Colorful Options: Orange
Your Scrapbook Place: ATG (1/3)
Four Seasons: ATG FALL
Word Art Wednesday #563 - #564: ATG (1/5)
My Time to Craft #491: Pick 3 Autumn colors (kraft, orange, brown)
Use Your Stuff #468: Autumn/Fall
Addicted to Stamps and More #439: Any Occasion
CD Sunday Plus #95: ATG with digital elements (1/3)
Everybody Art #521: Autumn Magic
QKR Stampede #453: ATG (1/3)
Creatalicious #244: ATG (1/3)
Penny's Paper Crafty #531: ATG (1/3)
Colour Crazy #39: ATG (1/2)
Make My Monday #184: Autumn Flora or Fauna
The Outlawz Twisted Thursday: ATG
The Outlawz Festive Friday: Fall
The Outlawz October Linky: ATG
Ok friends, that's all for today! I appreciate you stopping by, and don't forget to head on over to the Digi Choosday challenge to join in! Until next time...
💗 Stay Healthy, Take Care, and God Bless! 💗
~ Marie
Hello, my friends! It's time to SPRING INTO CHRISTMAS with the team at Build Your Stash Holiday Cardmakers! As you can see on the prett...


